Api集中管理和请求拦截
...大约 3 分钟
Api集中管理和请求拦截
luch-request介绍
这里用到的插件为luch-request
为什么要用luch-request?
uni.request
无法满足项目级开发要求,无拦截器,无自定义api.
你的使用方式
uni.request({
    url: this.$baseUrl + 'api/user'
    method: 'POST',
    data: {a:1},
    header: {Content-Type: '...', token: '....'}
    success: (res) => {},
    fail: (err) => {}
})
使用luch-request后
this.http.post('/api/user', {a:1}).then(res => {
    ...
}).catch(err => {
    ...
})

async login() {
		let ret = await this.api.post('/user/login',{
			name: this.userName,
			password: this.password
		});
		// 此处在函数体外写了async,并且使用了await等待返回,所以可以打印ret结果
		// 意味着这里的console.log是等待了几十毫秒请求返回后才执行的
		console.log(ret);
	}
api集中管理后
this.api.login({
	name: this.userName,
	password: this.password
}, {
	custom: {auth: false}//不携带token
}).then(res => {
	...
}).then(err=>{
	...
})

	//异步请求
	async login(){
			let ret = await this.api.login({
				name: this.userName,
				password: this.password
			});
			console.log(ret);
	}
具体实现
首先下载好luch-request,放进项目里,我这里是新建了一个libs 目录放一些插件

首先在项目新建一个目录,我这里以common为例子,我习惯将一些工具放在此目录,再新建一个api目录,以及目录下的index.js(全局配置、拦截配置)和api.js(api集中管理)
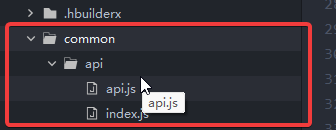
首先配置index.js,这里只配置一部分可自己根据luch-request文档做出更多配置
import Request from '@/libs/luch-request/luch-request/index.js'

const http = new Request({
	baseURL: "http://localhost/xxx", //设置请求的base url
	timeout: 300000, //超时时长5分钟,
	header: {
		'Content-Type': 'application/json;',
	},
//自定义参数
	custom: {
		auth: true,//是否则携带token
		toast: true//请求后是否展示错误弹窗
	}
})
//请求拦截器
http.interceptors.request.use((config) => { // 可使用async await 做异步操作
	if (config.custom.auth) {
		const token = uni.getStorageSync('token');
		if (token) {
			config.header['Authorization'] = 'Bearer ' + token;
		}
	}
	console.log(config, 'config')
	return config
}, error => {
	return Promise.resolve(error)
})

// 响应拦截器
http.interceptors.response.use((response) => {
	console.log(response.data, 'data')
	if (response.data.code != 200) {
		uni.showToast({
			icon: 'none',
			title: response.data.msg
		})
	}
	return response.data
}, (error) => {
	return Promise.resolve(error)
})

export default http
api.js(未修改插件源码前)
import http from '@/common/api/index.js'
/**
 * @param params - 参数
 * @param config - 局部配置,会覆盖全局配置,局部>全局
 */
const api = {
	//这里需要说明一下,get方法的参数,和全局配置都放在了第二个参数里
	getTestData: (params, config = {}) => http.get("/test", {params,...config}),
	//post请求中第二项为参数,第三项为配置,有些不同
	postTestData: (params, config = {}) => http.post('/test', params, config),
}
export default api
当然,也有办法将get方法修改为post哪样,查看源码
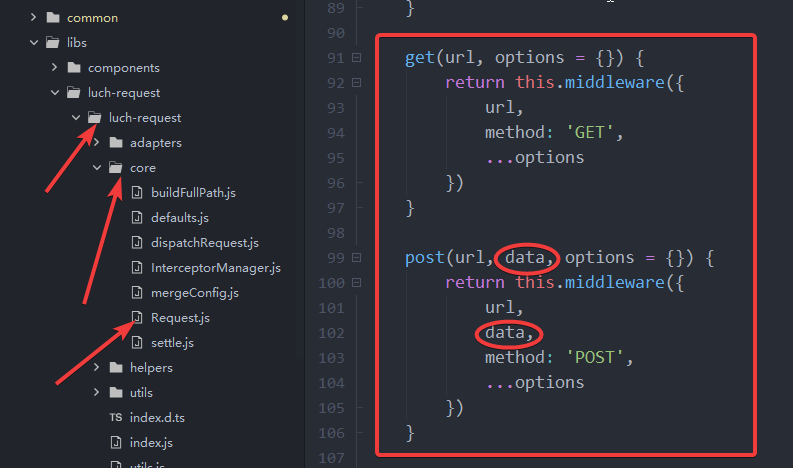
调试之后发现get的参数得放在params里
修改后:
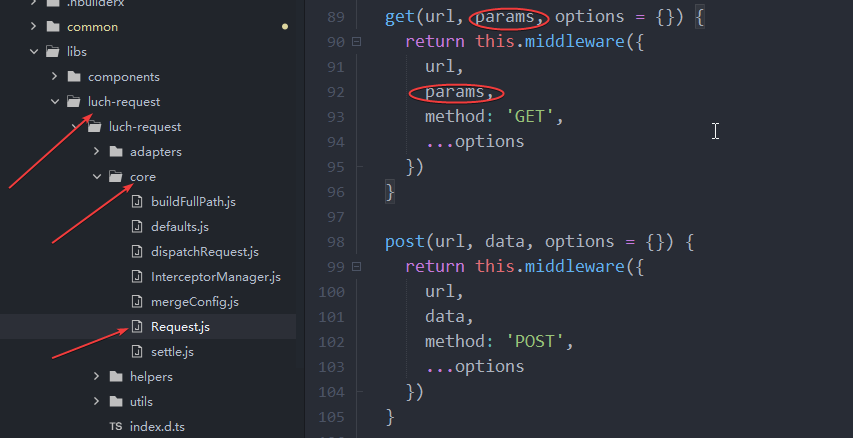
api.js(修改插件源码后)
import http from '@/common/api/index.js'


//修改源码后,传参方式都一样了,个人感觉这样方便一点,看个人选择


/**
 * @param params - 参数
 * @param config - 局部配置,会覆盖全局配置,局部>全局
 */
const api = {
	post: (params, config = {}) => http.post(params),
	get: (params, config = {}) => http.get(params),
	put: (params, config = {}) => http.put(params),
	upl: (params, config = {}) => http.upload(params),
	del: (params, config = {}) => http.delete(params),
	getTestData: (params, config = {}) => http.get('/test', params, config),
	postTestData: (params, config = {}) => http.post('/test', params, config),
}
//一定要记得导出
export default api
main.js
//需要放在import Vue from 'vue'之后
import api from '@/common/api/api.js'
Vue.prototype.api=api
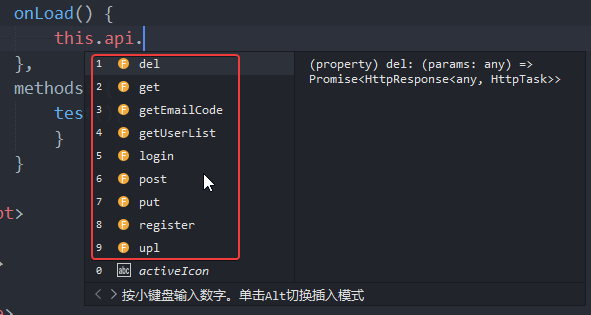
然后就可以在任何位置使用this.api.xxx使用了,也会有代码提示
